We are bursting at the seams.....with three kids who love outdoor sports, mainly dirt biking, we have had the need for additional storage. My husband envisioned building a shed into the hill on the side of our house but the boys used that hill as a snowboard practice terrain park.
When the boys outgrew our little backyard snowboard hill, we were ready to build a place for all of our extra outdoor "stuff". My husband designed it with CAD software. This was his fourth shed project - he had built a shed for a high school girlfriend's grandfather, one for our local little league and one for our property "up north". This wasn't the largest of his shed projects but it was his most ambitious.
The first step was to dig for the foundation. Our oldest son helped hand dig and wheelbarrow all of the dirt to our patio.
The next step was to put in forms for the foundation. The foundation was an engineered slab. Twelve inches thick on the edges and six inches thick in the center with rebar around the edges in the one foot thick portion.
The next step was to pour the foundation. We had Redi-Mix Concrete delivered. We rented a concrete buggy and enlisted the help of some of my husband's co-workers to pour the slab. It was a tricky operation because the buggy was heavy and the concrete had to be delivered half way down the hill without going into the hole. Unfortunately, we don't have pictures of this process.
After the slab was poured, it was time for the concrete block work. First, the blocks were laid out on the driveway.
Next, the blocks were placed "for real" on the concrete slab.
We continued to place the blocks. After the blocks reached full height, they were core filled with concrete and rebar from top to bottom. This required 60 bags of concrete mix - all hand mixed.
After the block work was complete, water proof paint was applied, then tar, then 6mil poly, then styrofoam to protect the plastic - and "just because". Also perforated subsurface drain pipe was placed around the perimeter of the slab and directed to a french drain. Next, we needed to back fill the foundation but the original excavation was just large enough to put the foundation in. The back fill needed to be sloped 10 feet out so more sod and topsoil needed to be removed.
After the sod and topsoil were removed, it was time to haul the dirt from the original excavation. We were a little short on dirt.
We had to have 10 yards of sand delivered to the driveway and then it had to be hauled by wheel barrow to the back yard.
Next we formed up a concrete walk at the access to the top of the shed and at the bottom of the shed. We poured and finished the concrete.
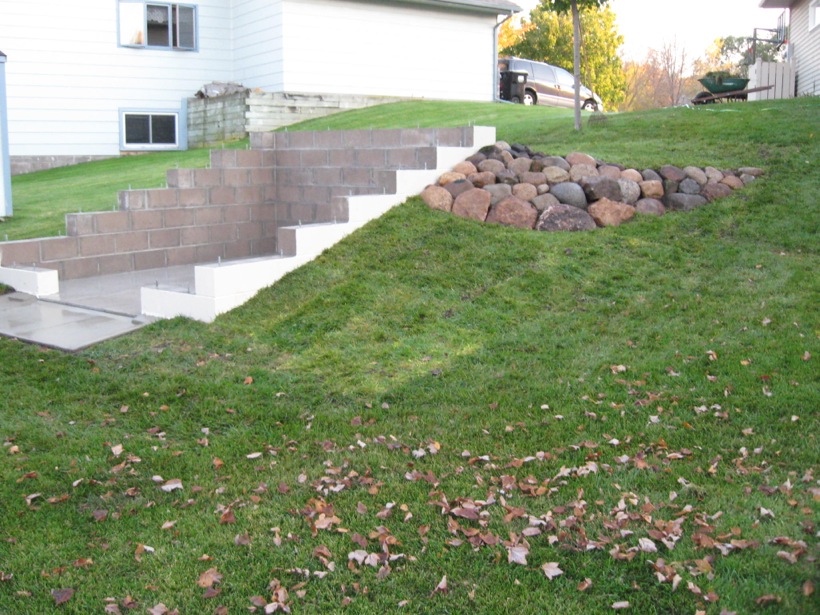
We then placed the topsoil and sod back and built boulder retaining walls.
This was going to be how we were going to leave it for the season but we had such mild weather in the fall that we decided to continue the project. The framing was next.
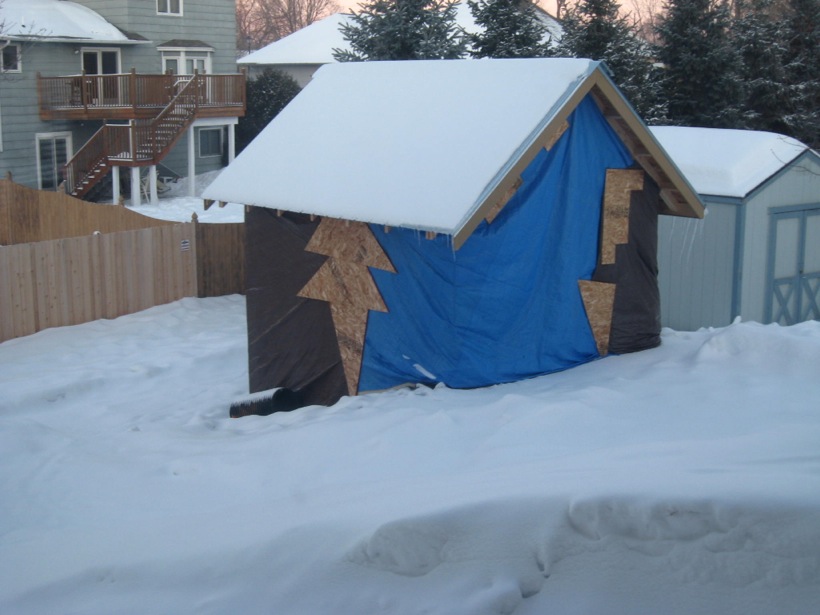
After the framing and OSB sheathing, my husband built trusses, installed them and put on a metal roof. Then we were into winter. He attached a tarp and left it for the next season.
The next summer he installed the 4x8 concrete siding (over the OSB sheathing), windows and treated wood battens.
Next he built double doors for the front and back with treated lumber. We caulked, and painted with three coats of paint and did other miscellaneous finishing touches.
It was built to last - it will be here long after we are gone. Maybe my artist's studio will be next!
"If a job's worth doing, it's worth doing well." -Unknown


No comments:
Post a Comment